In this article, you will learn how to manage vehicles under the All Sites tab. The All Sites tab categorizes vehicles by location for ease of access. The sections below will walk you through each feature:
View Vehicles - All Sites
This section will guide you on accessing and viewing vehicles by location using the All Sites tab.
- In the Business Navigation Menu, click Vehicles and select Vehicles List.
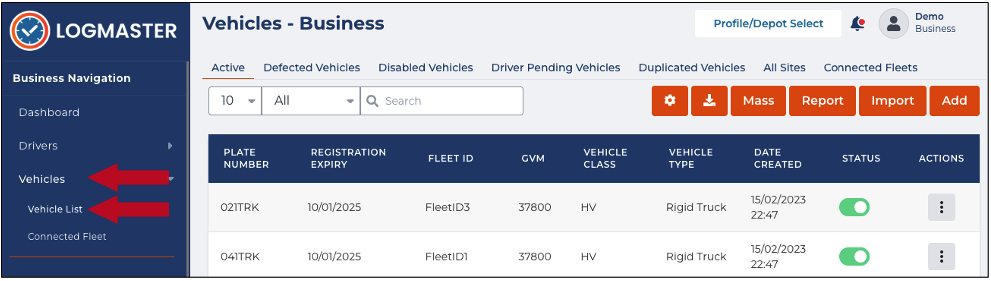
- You will be directed to the Vehicles - Business page. When you access this page, the Active tab is open by default. Click the All Sites tab.
- You can search/filter the list using the Search field to view the vehicle/site. You can set the list display to 10, 20, or 50 using the drop-down arrow beside the Search field.
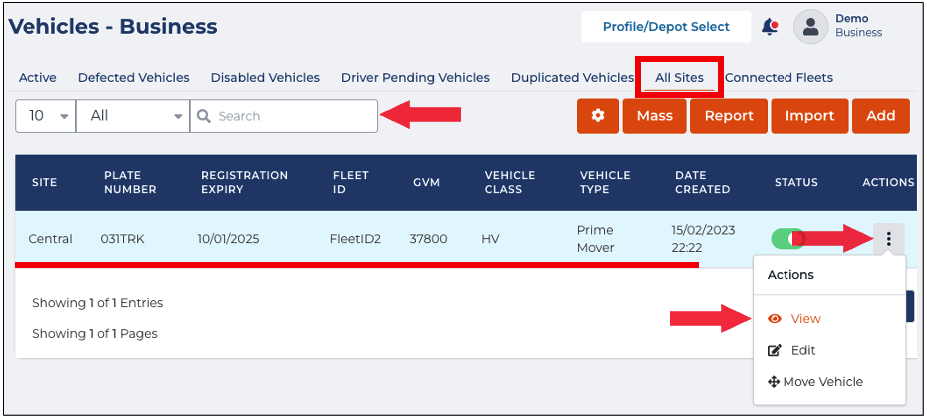
- Find the vehicle/site from the list and click its Action icon. The Actions menu will expand, select View.
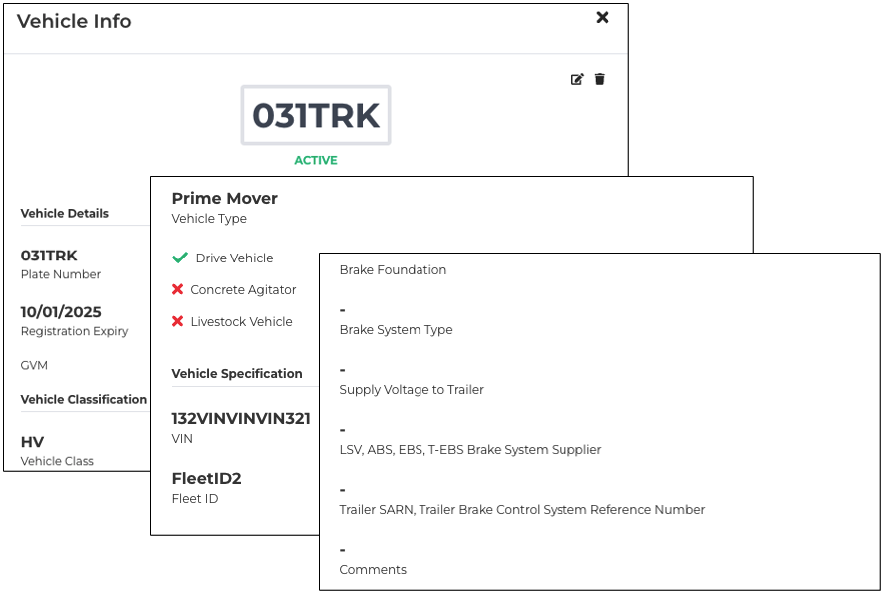
- The Vehicle Info window will appear displaying the Vehicle's details. In this window, you can view the vehicle's information, and edit or delete it.


Edit Vehicles - All Sites
This section will guide you on editing vehicle details using the All Sites tab.
- In the Business Navigation Menu, click Vehicles and select Vehicles List.
- You will be directed to the Vehicles - Business page. When you access this page, the Active tab is open by default. Click the All Sites tab.
- The Search field allows you to search/filter the list to view the vehicles/sites. The drop-down arrow beside the Search field allows you to set the list display to 10, 20, or 50.
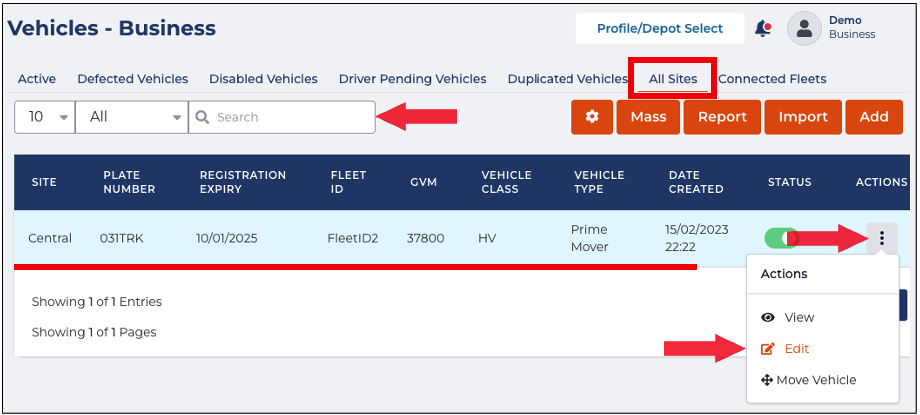
- Find the vehicle from the list and click its Action icon. The Actions menu will expand, select Edit.
- The Vehicle Edit window will appear. In this window, you can update the following details:
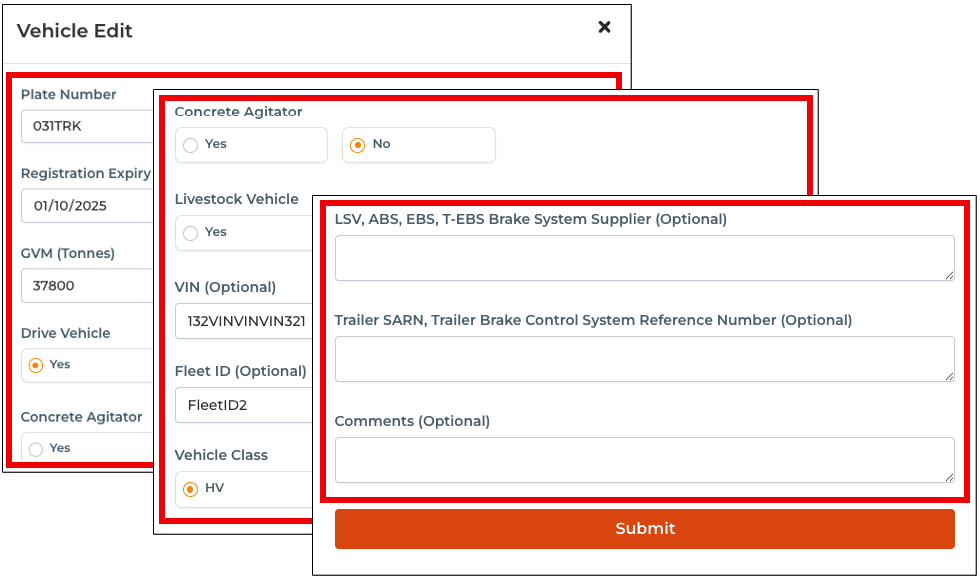
- Plate Number
- Registration Expiry
- GVM (Tonnes)
- Drive Vehicle
- Concrete Agitator
- Livestock Vehicle
- Vin(Optional)
- Fleet ID (Optional)
- Vehicle Class
- Vehicle Type
- Front Couplings (Optional)
- Rear Couplings (Optional)
- Power Couplings
- Brake System Type (Optional)
- Brake Foundation
- Supply Voltage to Trailer
- Suspension (Optional)
- LSV, ABS, EBS, T-EBS Brake System Supplier (Optional)
- Trailer SARN, Trailer Brake Control System Reference Number (Optional)
- Comments (Optional)
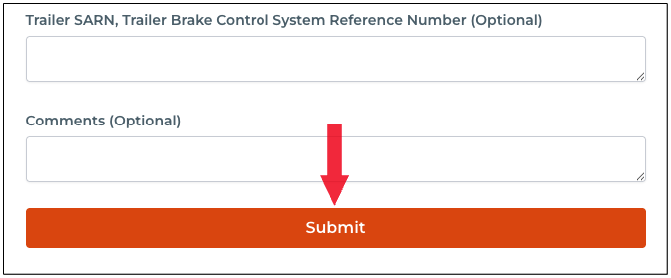
- After updating the vehicle, click the Submit button to apply the changes.


Move Vehicles - All Sites
This section will guide you on moving vehicles from one location to another using the All Sites tab.
- In the Business Navigation Menu, click Vehicles and select Vehicles List.
- You will be directed to the Vehicles - Business page. When you access this page, the Active tab is open by default. Click the All Sites tab.
- The Search field allows you to search/filter the list to view the vehicles/sites. The drop-down arrow beside the Search field allows you to set the list display to 10, 20, or 50.
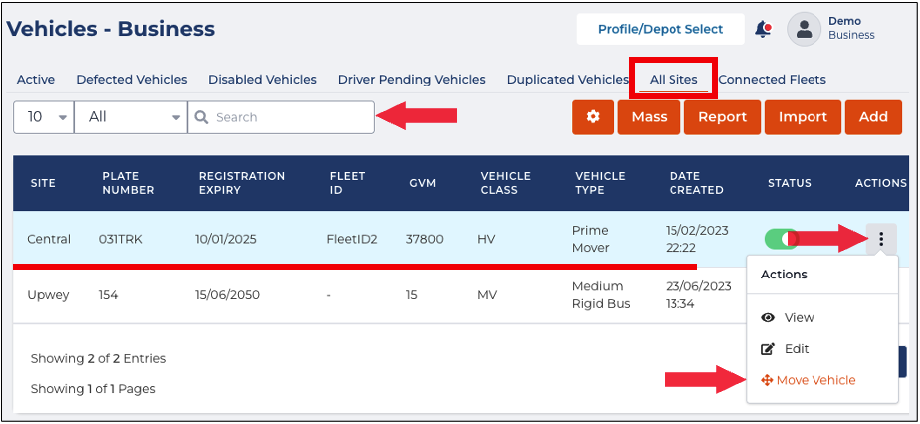
- Find the vehicle from the list and click its Action icon. The Actions menu will expand, select Move.
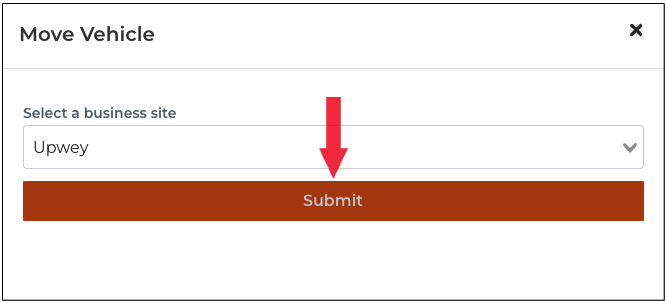
- A Move Vehicle dialog box will appear. Click the drop-down arrow to select the site to which you want to move the vehicle.
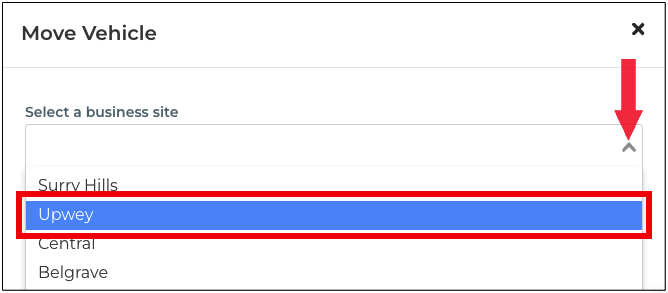
- Click the Submit button to continue moving the selected vehicle.